
One of the main jobs I have undertaken is the purchase of an elderly blasting cabinet and its modification, since I have been working predominantly on wine glasses and tankards a smaller cabinet was necessary.
After a lot of years building and using cabinets I have a fair idea of what I want in a cabinet, easy access, bright lighting and strong extraction, these are the 3 main pre-requisites that are generally missing from most mid priced cabinets. So I bought an old, once expensive cabinet with 2 of the requirements and its made of plastic.
The cabinet I chose is a Guyson Jetstream 22.

Its a front lifting pedestal cabinet, the smaller of the 2 plastic body's that Guyson make, the other being the Galaxie.

This type of cabinet cry's out for modification and I took up the challenge, the cabinet cost £210 plus a whopping £60 pallet delivery still a basic SBC 220 would a lot more so a bargain.
The lighting was very basic, just a bulb in a glass case which was broken but on the up side the cabinet had never been used for blasting, whoever had it used it for blowing dust as there was only a blowgun in the cabinet and the extraction hole was blanked off. It just needed a good scrub and it was as good as new.
The first change was the lighting system, I had bought 2 LED floodlight from ebay.

and the first job was to bolt this to the top of the unit.

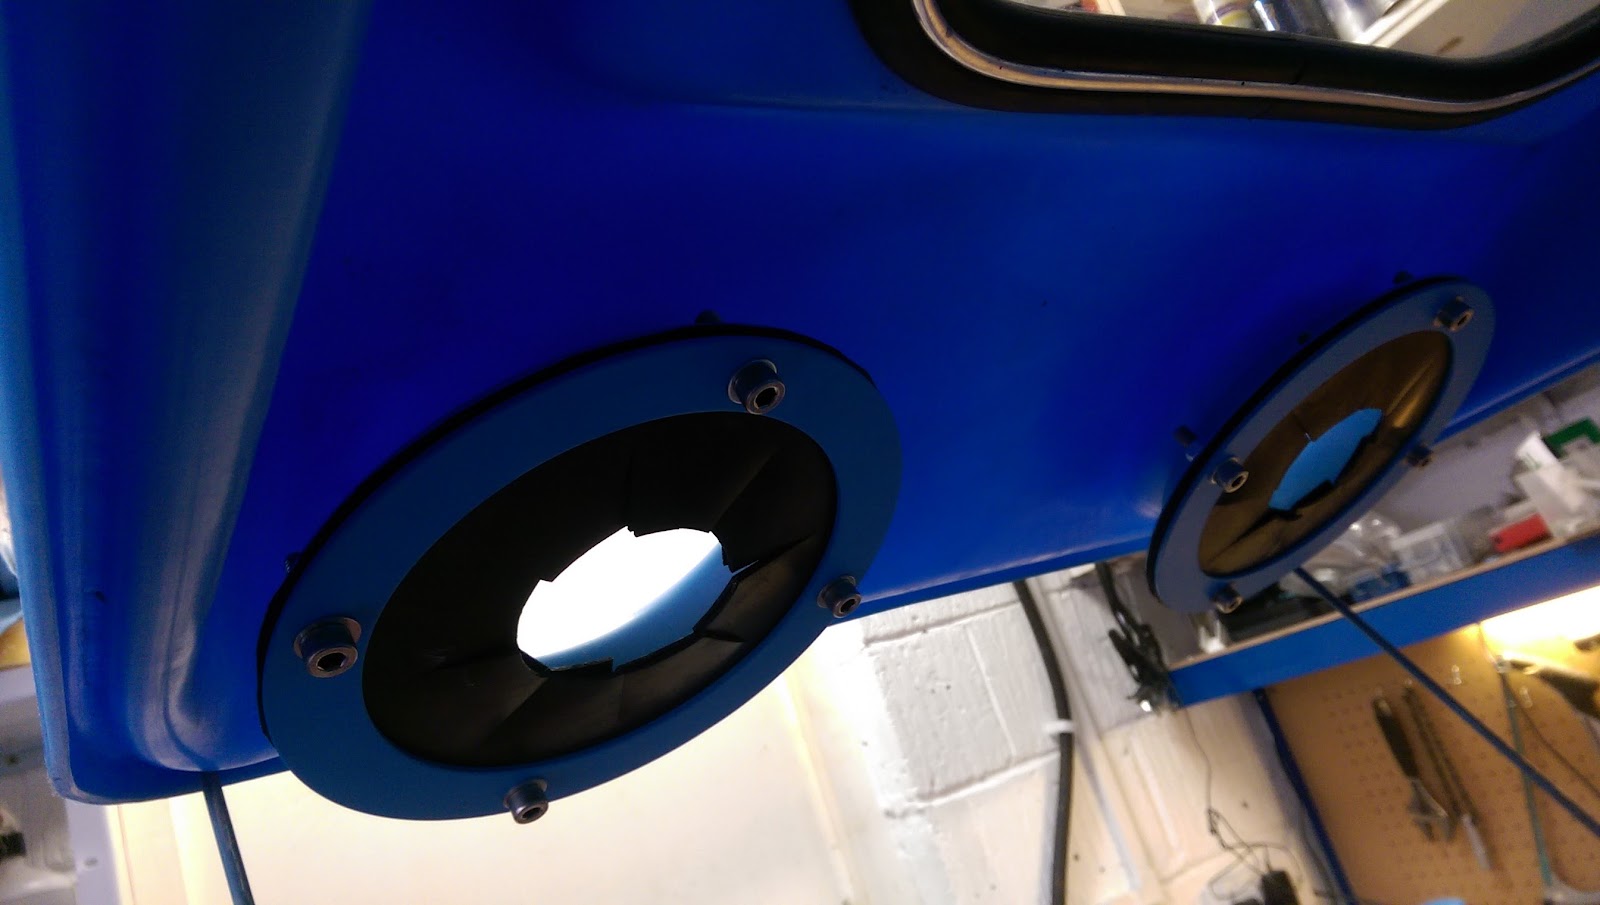
The next job was the arm entry holes, I hate using gloves so they had to go and I designed and built rubber arm hole adapters.
These consist of 3 separate parts a outer flange an inner flange with a locking ring welded on with nuts welded for locking grub screws. The rubber is the sandwich in the middle.

Put them all together and we have arm holes.

Better than the huge gloves fitted.
The inside of the cabinet that the gloves fit around now take the turned rings and tighten in place with the grub screws.

So now I just put my arms through and the slit rubber forms around and makes a seal.

The down side of all this steel is that it makes the front of the cabinet very heavy so I made a handle to aid lifting, since using this cabinet I have found that I hardly require to lift the cabinet as most glasses fit through the arm holes.

I also had a tin of paint mixed to approximate the colour and sprayed everything.
Air supply and control.
This is the main part of the modification as I wanted the pressure regulator, lighting and extraction all accessible from one control box on the top of the unit.

I gathered together the switches, regulator and pipe fittings then bent a box to fit it all in.

The air regulator has a tee fitted before the inlet to act as a bypass to supply full pressure air to a foot operated blow nozzle situated inside the unit.

I built up the control box and bolted to the top of the unit.


The gun I am using is the big 6mm nozzle I bought last year for my other cabinet and used in conjunction with the foot pedal.

I stripped down the pedal, painted and fitted smaller fittings to the in / out.

Once I decided where the foot pedals could fit for the best I bolted it onto the unit and drilled the holes for the pipework.

The air blower pipe work exposed and the operating button, just press for air flow.

The hoses are run through the unit.

I have fitted a water trap regulator to the back of the unit, there is also a water trap attached from the comp outlet so nice dry air.

This is the inside of the cabinet.

The nozzle pickup is buried in the media under the grid and the blue tube from the negative pressure pipe at the back keeps it in the air and the black hose is the blow tube.

So, just plug in the air, press the pedal and off she goes, then press the green air button and and you can blow the glass clean.
Extraction.
The cabinet had a huge 100mm outlet at the back and a diffuser cover plate at the front.

I had to reduce this 100mm down to fit a normal hose and found the reducer on ebay from a company called Charnwood.

Unfortunately the O.D of the reducer is the same as the cabinet outlet so I made a mitred adapter with grub screws to take both ends.

The power for the vacuum is a simple 3 pin metal cased socket wired into the controller switch.


The lighting was very basic, just a bulb in a glass case which was broken but on the up side the cabinet had never been used for blasting, whoever had it used it for blowing dust as there was only a blowgun in the cabinet and the extraction hole was blanked off. It just needed a good scrub and it was as good as new.
The first change was the lighting system, I had bought 2 LED floodlight from ebay.

and the first job was to bolt this to the top of the unit.

The next job was the arm entry holes, I hate using gloves so they had to go and I designed and built rubber arm hole adapters.
These consist of 3 separate parts a outer flange an inner flange with a locking ring welded on with nuts welded for locking grub screws. The rubber is the sandwich in the middle.

Put them all together and we have arm holes.

Better than the huge gloves fitted.
The inside of the cabinet that the gloves fit around now take the turned rings and tighten in place with the grub screws.
So now I just put my arms through and the slit rubber forms around and makes a seal.

The down side of all this steel is that it makes the front of the cabinet very heavy so I made a handle to aid lifting, since using this cabinet I have found that I hardly require to lift the cabinet as most glasses fit through the arm holes.

I also had a tin of paint mixed to approximate the colour and sprayed everything.
Air supply and control.
This is the main part of the modification as I wanted the pressure regulator, lighting and extraction all accessible from one control box on the top of the unit.

I gathered together the switches, regulator and pipe fittings then bent a box to fit it all in.

The air regulator has a tee fitted before the inlet to act as a bypass to supply full pressure air to a foot operated blow nozzle situated inside the unit.

I built up the control box and bolted to the top of the unit.

The lighting wire attached and hoses run.

The gun I am using is the big 6mm nozzle I bought last year for my other cabinet and used in conjunction with the foot pedal.

I stripped down the pedal, painted and fitted smaller fittings to the in / out.

Once I decided where the foot pedals could fit for the best I bolted it onto the unit and drilled the holes for the pipework.

The air blower pipe work exposed and the operating button, just press for air flow.

The hoses are run through the unit.

I have fitted a water trap regulator to the back of the unit, there is also a water trap attached from the comp outlet so nice dry air.

You can see the air inlet quick release fitting on the water trap inlet, so the route is thru the trap to the control box reg, out of the reg to the foot switch, out of the switch to the nozzle.
The blower runs from the bypass tee to the green button switch then through to the cabinet.
This is the inside of the cabinet.

The nozzle pickup is buried in the media under the grid and the blue tube from the negative pressure pipe at the back keeps it in the air and the black hose is the blow tube.

So, just plug in the air, press the pedal and off she goes, then press the green air button and and you can blow the glass clean.
Extraction.
The cabinet had a huge 100mm outlet at the back and a diffuser cover plate at the front.

I had to reduce this 100mm down to fit a normal hose and found the reducer on ebay from a company called Charnwood.

Unfortunately the O.D of the reducer is the same as the cabinet outlet so I made a mitred adapter with grub screws to take both ends.

The power for the vacuum is a simple 3 pin metal cased socket wired into the controller switch.

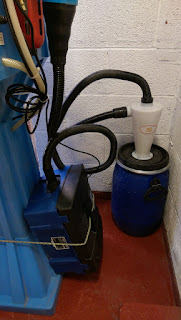
I had originally bought the Scheppach dust extractor thinking it might manage the dust but it was to fine for the bag so I had to add a cyclonic trap between the outlet and the vacuum.


This is the same system that I use on my big cabinet and works extremely well, the dust is swirled around and drops into the tub with only the smallest amount reaching the vacuum. This is a cheap Chinese copy only £13 inc delivery from China by airmail, amazing.
Everything works as planned and I am very pleased with it, the height for viewing is perfect and after a little practice my feet find the buttons without a problem.

The extraction is very powerful and clears everything immediately, the light in such a small space is very bright with the bonus of not giving out huge amounts of heat that the halogen light give out.
Only one drawback that I shall rectify is the small amount of media that falls out when the lid is lifted, easily fixed by making a small catch plate to fit on the underside.
Please read my last blog about being a contributor to this blog I'm sure the reader will appreciate.
Paul
Nice build, whats it look like to use? Dd you go for a pressure pot or pressurised hopper?
ReplyDelete